

 Blue Bottle’s Ginger Molasses Cookies
 Thai Curry with Salmon
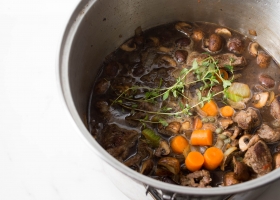
Ingredients
- 6 tablespoons butter
- 3/4 cup all purpose flour
- 1 teaspoon baking powder
- 1/4 teaspoon salt
- 2 eggs
- 1/2 cup sugar
- 2 tablespoons honey
I decided to add a new section to all future recipes and that’s the recommended items. You know that feeling you get when you walk into a Crate and Barrel and think, “Man, I want all these things, but do I really need an immersion blending? Can’t I just whisk it by hand? Why would I need a thermometer for my oven? I’ve already pre-set it. Someone told me once to use an ice cream scoop for my cookies but I think I can just eyeball it with a spoon…” While all these things are true (well minus the thermometer, you really can’t trust your oven, but I’ll get into that later) all these things were made for a reason, and it’s to make your life in the kitchen easier and more accurate.
“Okay, we get it, now tell us how to make cookies!”
You got it, but first a quick note about Madeline’s. Despite what you might think by seeing packaged Madeline’s in your local coffeeshop, the lifespan of a freshly baked madeline is really just a matter of hours. Of course you can keep them longer but you’ll notice their texture to change dramatically, the spongy and slightly crispy outer crust will become sticky and stick to the plate, tupperware, or other Madeleine’s that you’ve packaged them with. It’s best to make just enough for you and whoever else you’ll be sharing them with. You can save the batter for a couple of days in the fridge if you’d like to make the rest later. Okay, now onto the recipe!
Recommended items:
- Oven thermometer
- Ice cream scoop
- Immersion blender
- Standing mixer with whisk attachment
- Adjust a rack to the upper third of your oven.
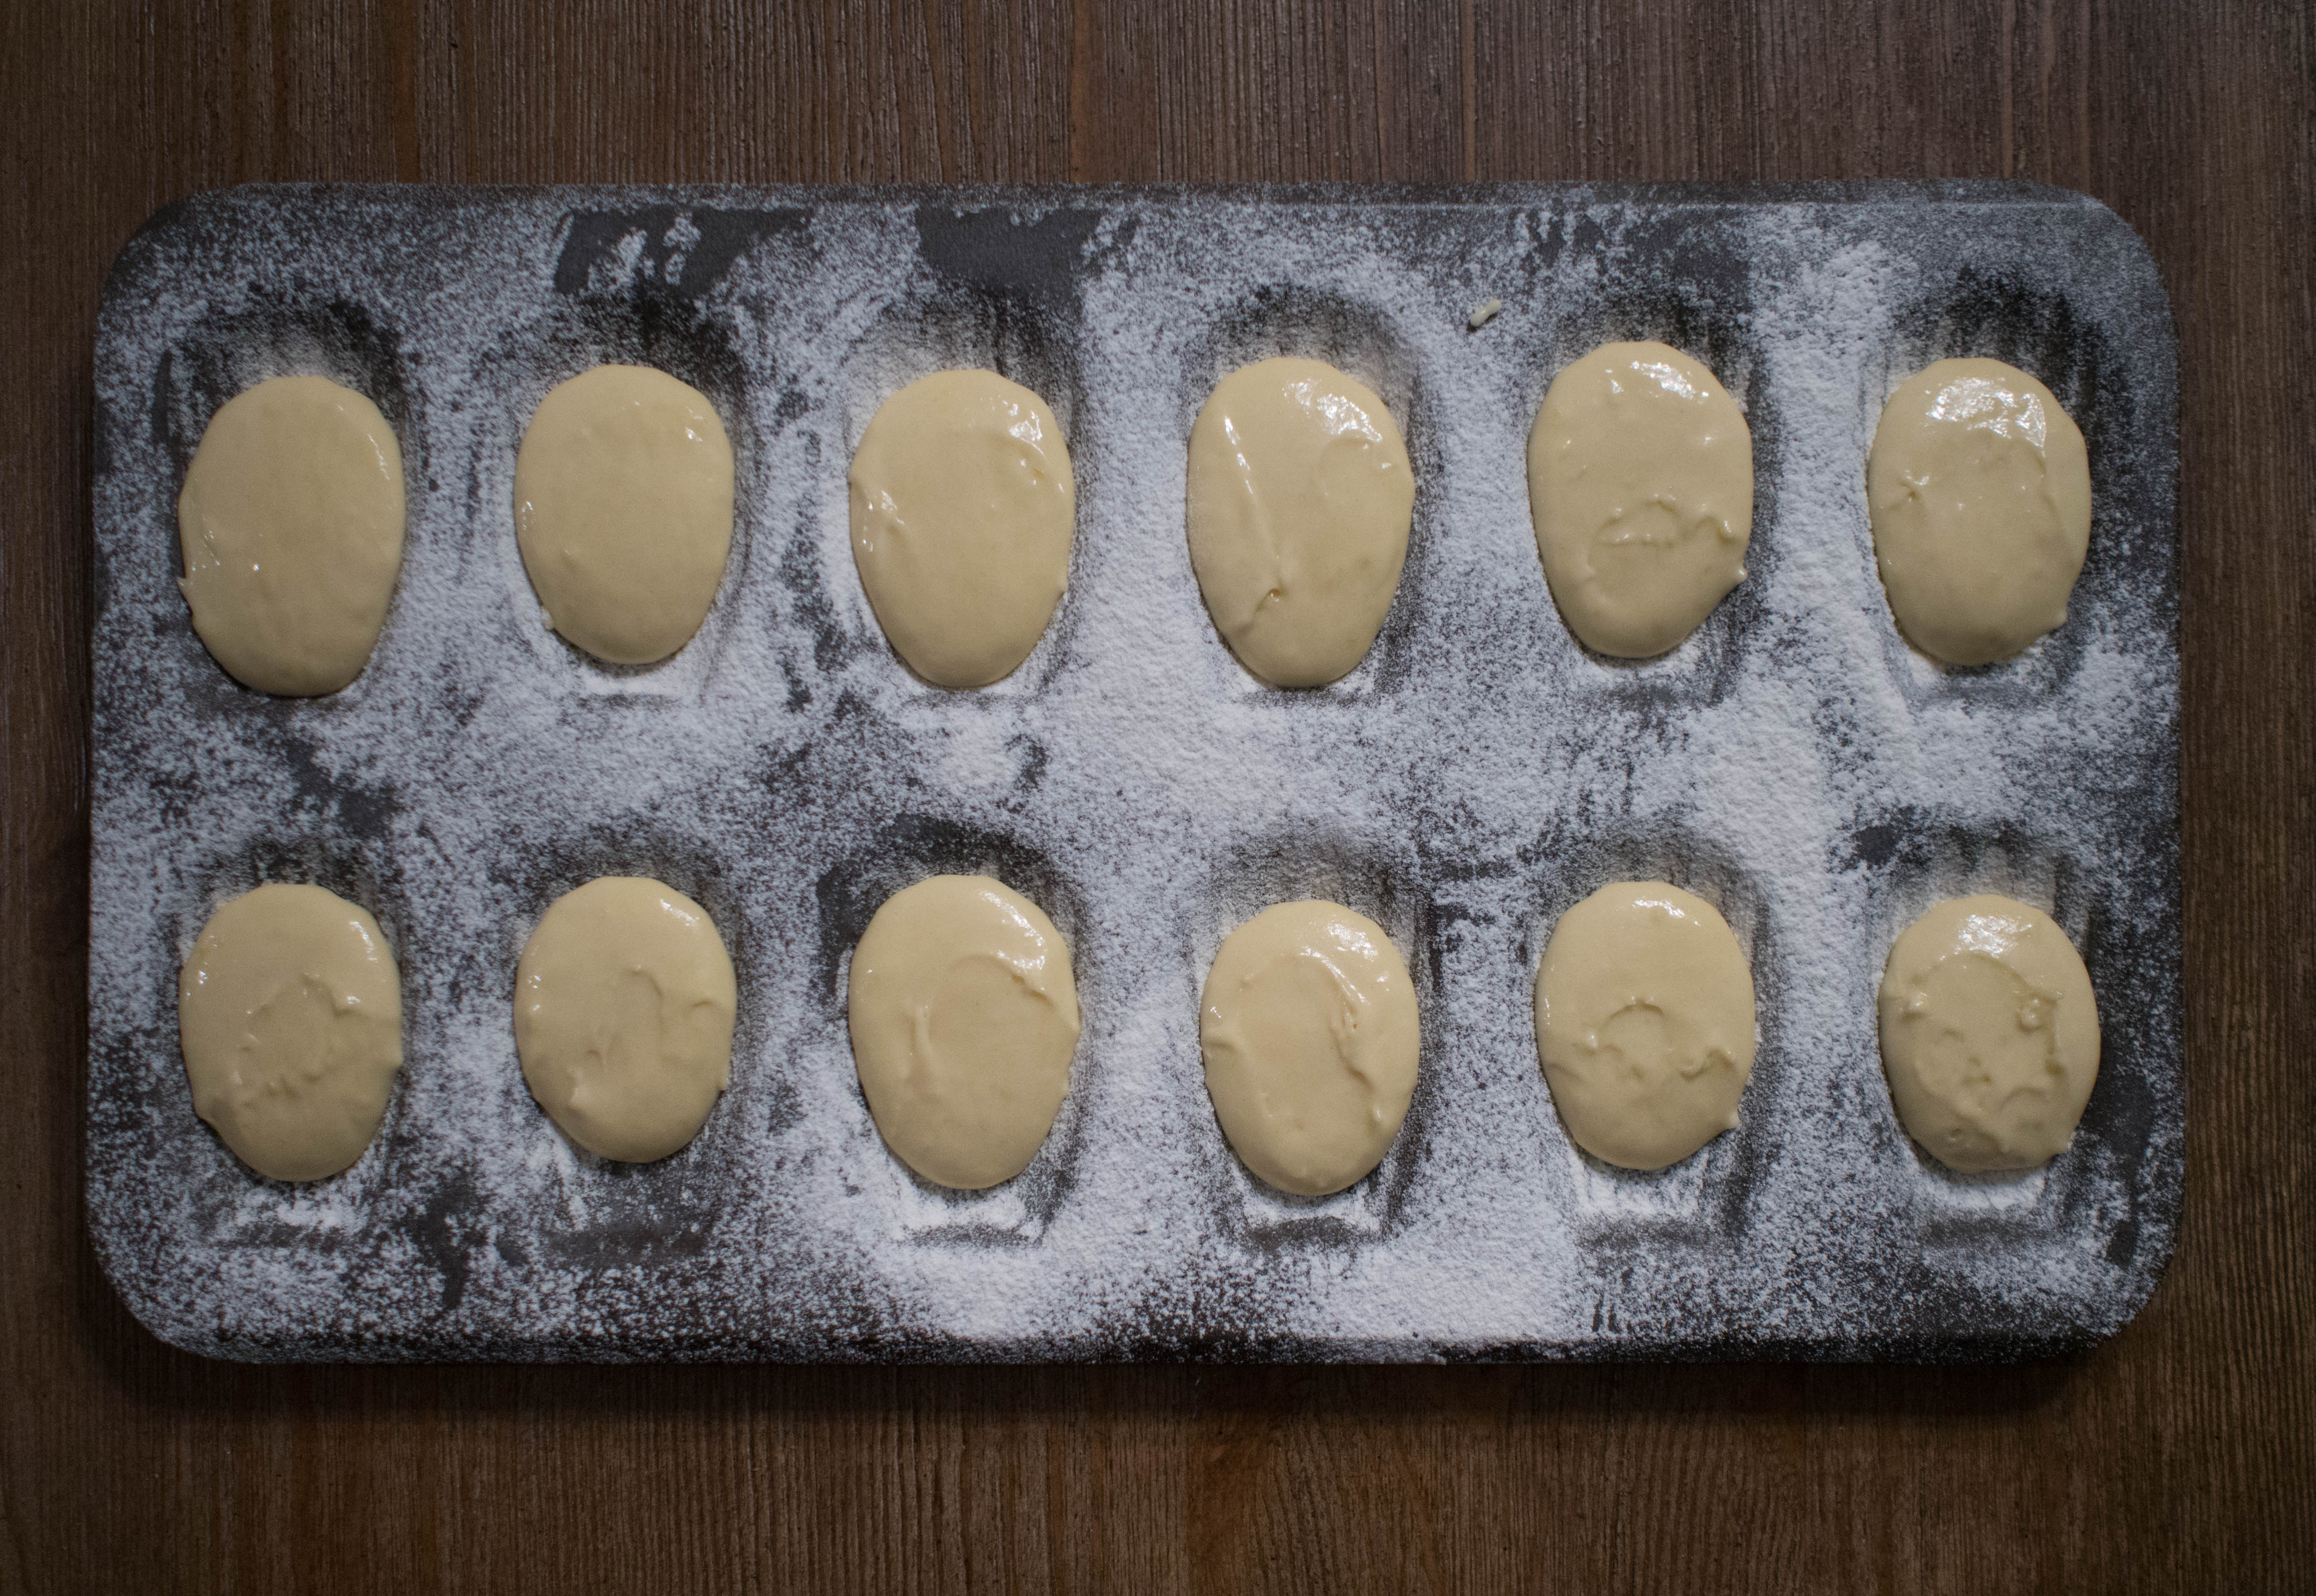
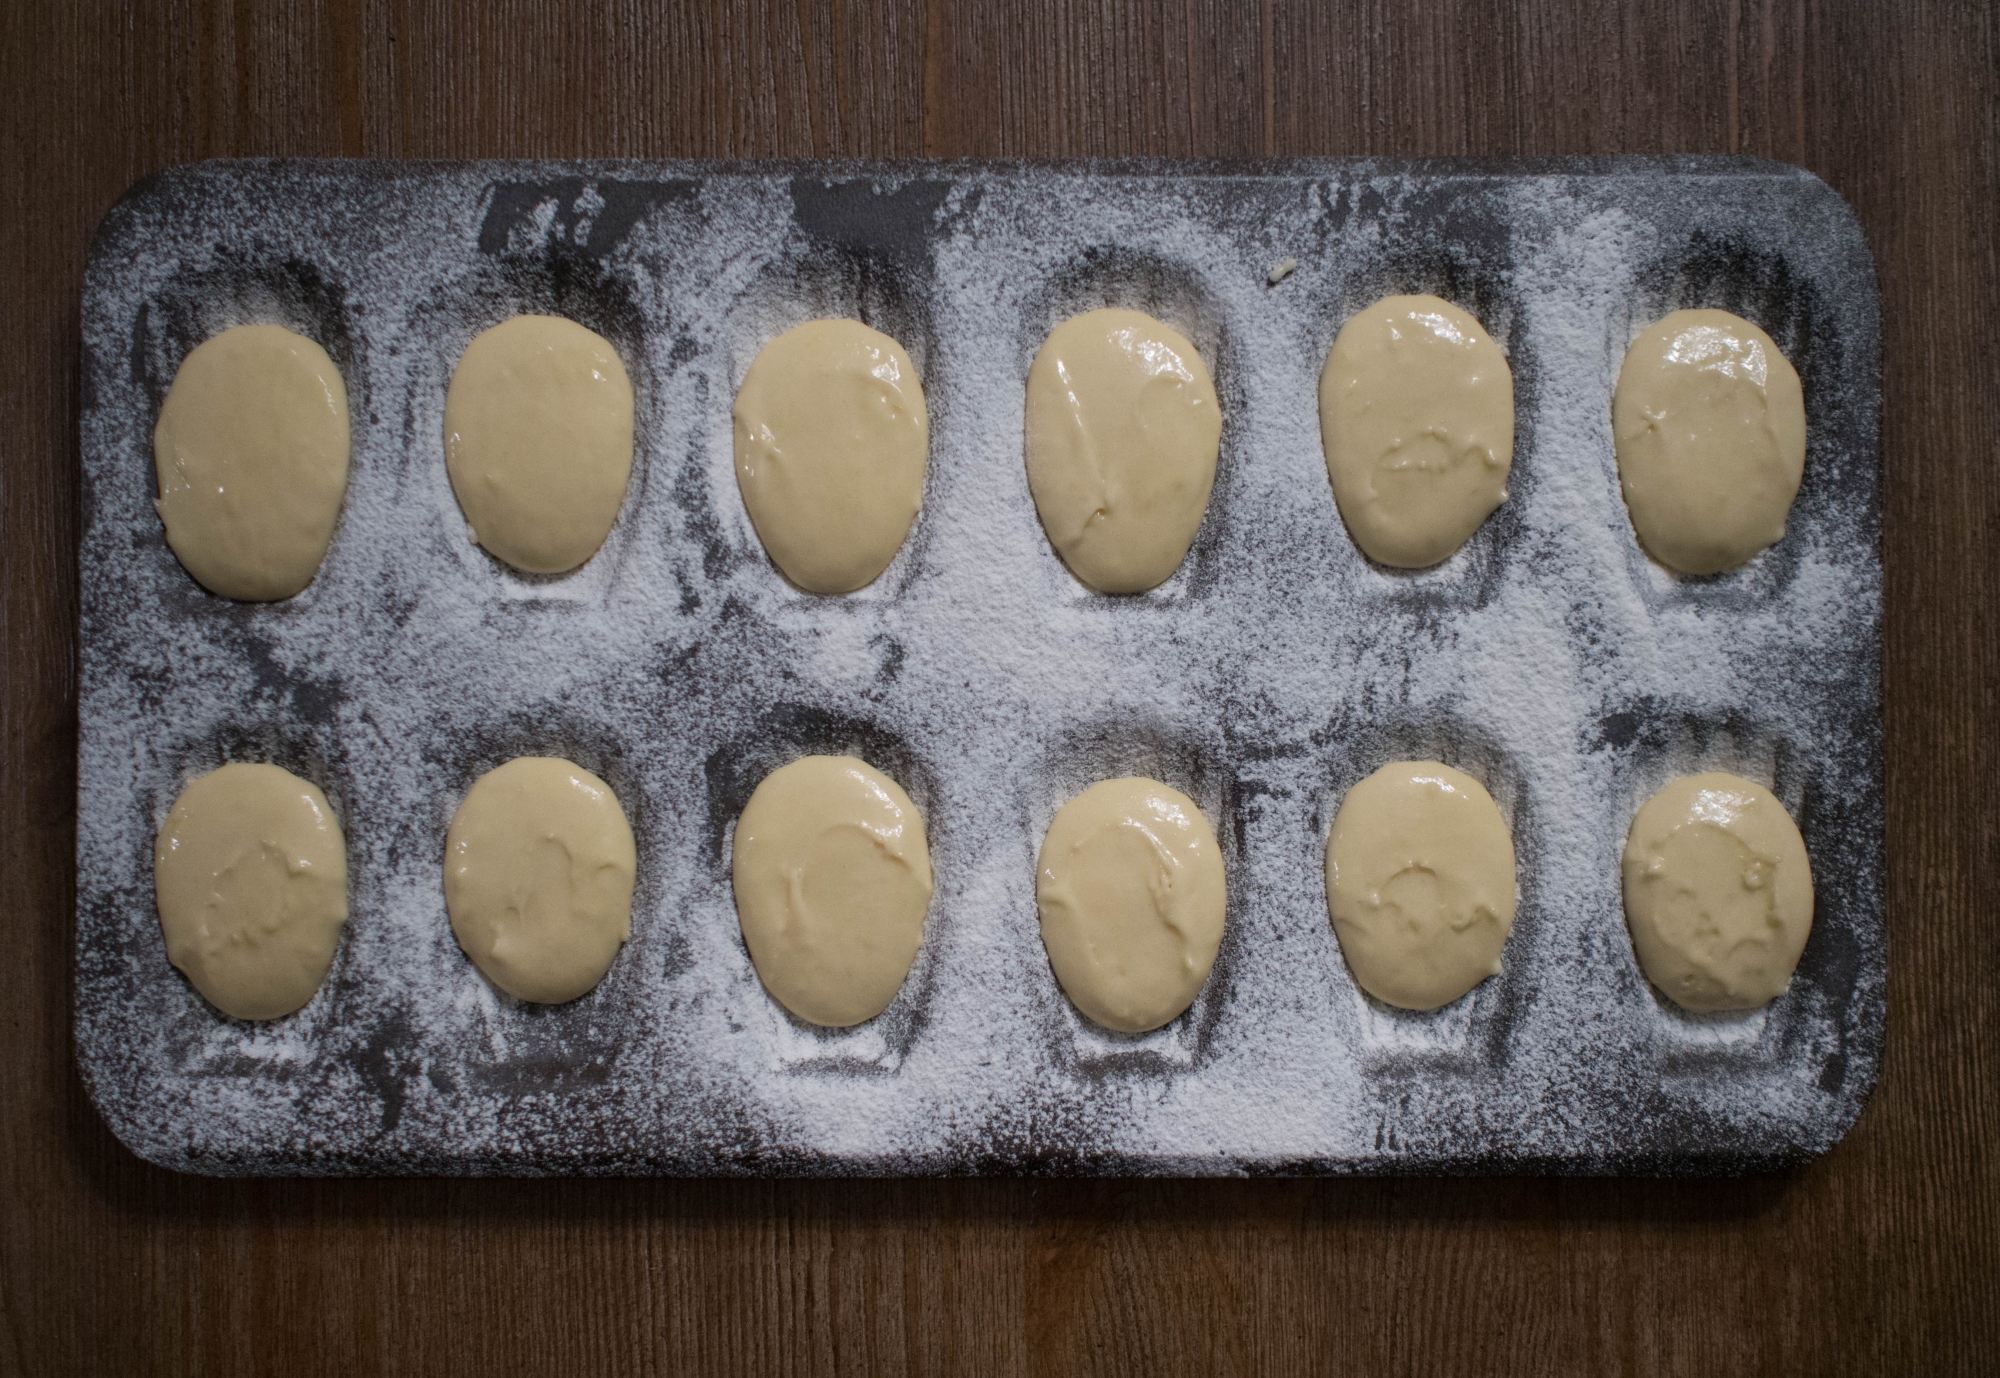
- Melt 1 tablespoon butter in a small cup and with a basting brush or by dipping a paper towel into the butter, grease up the madeleine pan (making sure to get in every groove.) Dust the entire pan with flour until there is a light layer covering the whole pan. Then refrigerate the pans. One of the most important elements to making sure you get that recognizable shell shape is by making sure that your pan is cold when inserting it into the oven.
- Sift the flour, baking powder and salt and set aside.
- On the top of a double boiler or a bowl set over a saucepan of simmering water, add the honey, sugar and eggs and mix vigorously until completely mixed together. I like to use an immersion blender for this. Then cook until the sugar is fully dissolved and is slightly warm (about 130˚F)
- Pour the egg/honey/sugar mixture into a mixing bowl and fit with a whisk attachment. Whip the mixture for about 10 minutes until it has expanded 3 times the volume.
- Fold the sifted dry ingredients into the egg mixture with a rubber spatula (fold in 1/3 of the dry ingredients at a time.) When almost incorporated, add the remaining butter and continue folding until the mixture has been fully incorporated.
- Place plastic wrap on the surface of the batter and allow to sit in the fridge for 4-24 hours. You can keep it in the fridge for up to 3 days.
- Using an ice cream scoop or a spoon, fill each shell with about 1 tablespoon of batter or about 3/4 full in each shell.
- Preheat oven to 350˚F. Place both pans in the oven on the same rack. Bake for approximately 9-12 minutes, or until golden brown in the center and browned edges – KEEP A CLOSE EYE ON YOUR MADELEINES! This is the most crucial part of the process because they burn very easily. Use oven thermometers if you have one because you can’t trust your oven! My first batch found this out the hard way, and there isn’t any salvaging a burnt version of this light fluffy cake cookie.
- Let cool for 10 minutes, using a knife, wedge it under the edge of each madeleine to pop them out of the mold. Allow them to cool shell side down.
- Madeleines are best served immediately! So grab a friend, a cup a coffee and nom on!

WHAT CAN GO WRONG:
- If you find that your Madeleine’s are forming a puffy bump in the center of them, try reducing your oven temperature by 25 degrees for your next batch.
- Be very very careful with the temperature of your oven, for your first batch, watch your cookies about 6 minutes in and make sure you know what your oven is adjusted to. Nothing’s worse than a burnt batch of cookies, especially if you don’t have more batter for a second batch.
100
0
100
1

No Comments